Adding a mat to a custom frame is a great way to enhance and draw focus to the artwork or photo being framed.
With just one click or tap, our ever-popular "Golden Ratio" button recommends a mat border based on the size of your art.

If you are looking for something slimmer or wider, we've made it easy to accomplish that as well.
And now, by popular demand, we've added three new customization features to help you achieve any desired look with your mat!
1) 8-ply Matting
The opening in each mat is cut on an angle, creating a beveled edge around the inside. The thickness of the mat board, or ply, determines the size of that beveled edge.
Standard mats are 4-ply, and we now offer a thicker, 8-ply mat in select colors for a more refined and elevated look.
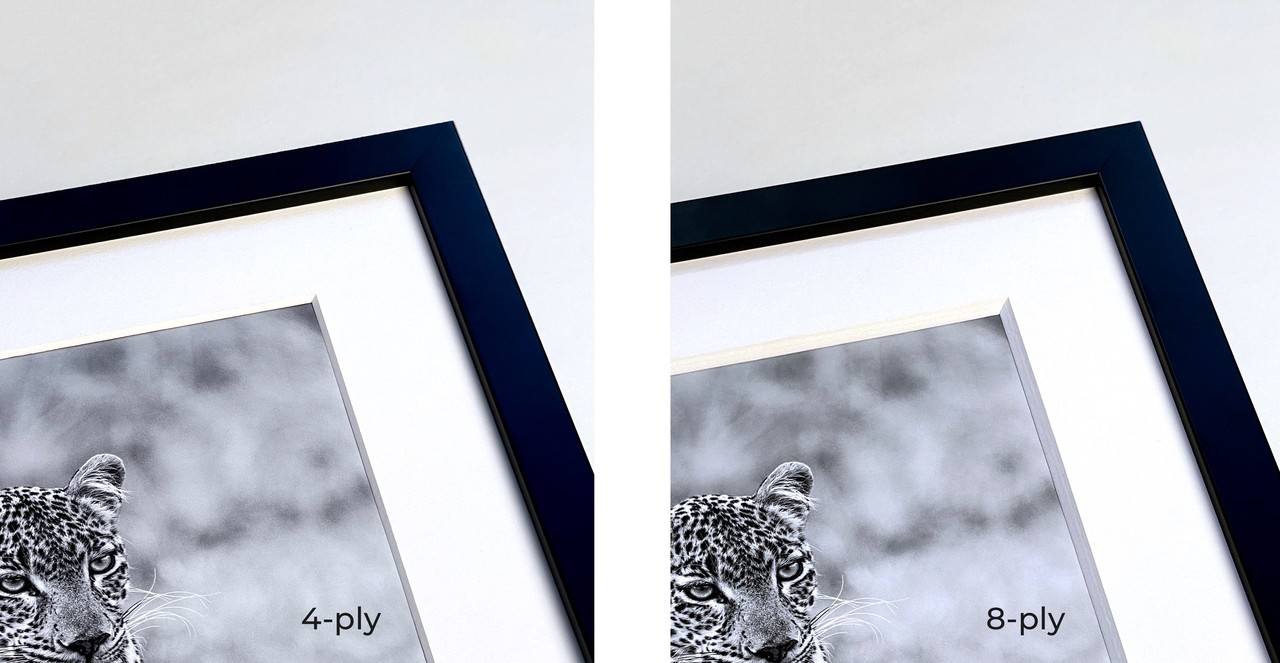
Framing black and white photos is a popular use case for these thicker mats, but they work beautifully on colorful prints and vintage artwork as well.
Along with additional colors in our standard matting, you can find 8-ply mats in a few different tones in the Advanced Options section of our frame customizer:
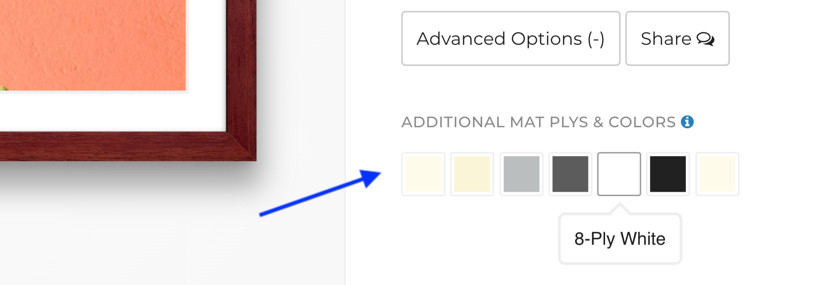
They are available for any custom frame, framed art print or photo, and even our fully-customizable collage picture frames.
2) Custom Mat Window Openings
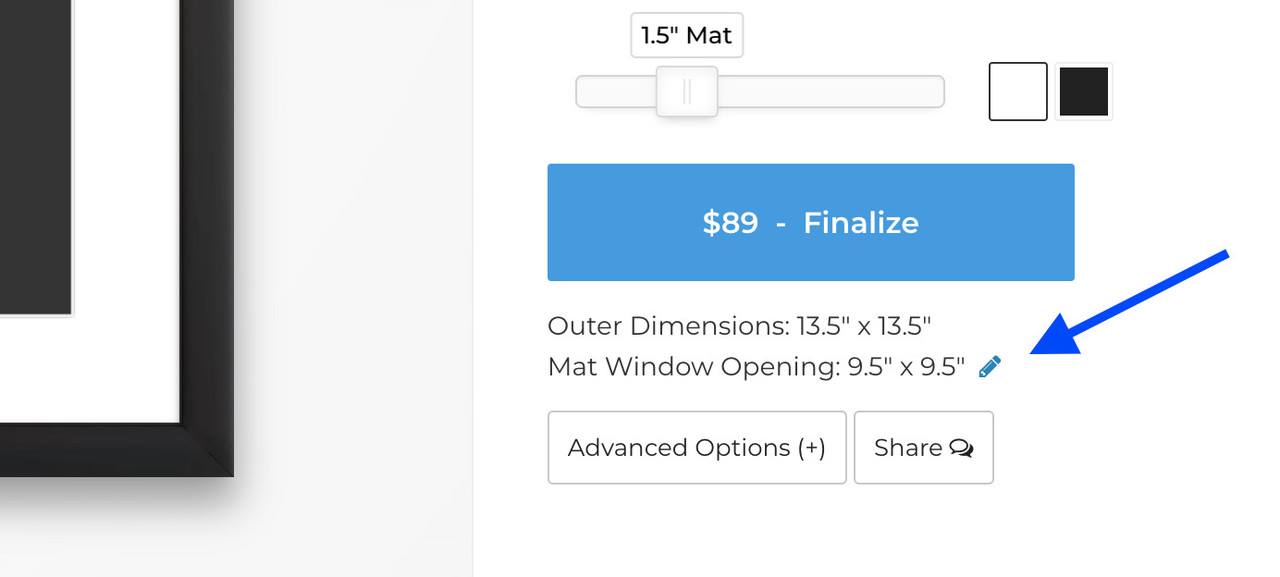
At the start of any custom framing project, we first ask for the dimensions of your artwork from edge to edge so that we can build the frame around it. When you add matting, we automatically set the mat window opening at 1/4" smaller than the art on each side so as to hold it in place.
If your artwork has borders or empty space that you wish to cover, you can now set a custom mat opening. This allows you to adjust how much the mat overlaps, or reveal a specific area of the work.
Look for the pencil icon next to the Mat Window Opening dimensions, and set the opening to whatever you need it to be.
Important note: The paper the art is on still needs to fit inside the frame underneath the matting. So if you want to avoid having to trim, double check that the inside frame dimensions (which we conveniently list for you) are big enough. If not, simply use the mat slider to increase the mat width until there is enough room.

Also make sure that the opening is not bigger than your artwork, otherwise it will fall through.
For an even more detailed look at custom mat openings, head over to our guide to Custom Framing Art with Borders or Signatures.
3) Bottom Weighted Mats and Advanced Widths
As we've covered above, you can customize the mat color, its ply, the width of the borders all the way around and the window opening.
So what's left?
Meet our Advanced Mat Widths tool, which allows customizing the width of each individual border; top, left, right and bottom.

An even mat border all the way around has become the default framing style for most people. Even borders (on our DIY custom frames) also allow you to reuse the mat and frame on a potrait or landscape photo if you ever have the need.
However, mat borders have traditionally been equal along the top and sides, and then anywhere from a 1/4" to 1" bigger at the bottom.
This technique, which you may have seen, is called bottom-weighting.

Framed art print with 1.5" top and side borders, bottom-weighted mat at 2"
You can use your eye to determine whether you like a bottom-weighted look, or how much extra width to add.
One fairly popular style is to take bottom-weighting to the extreme and add several inches of extra matting beneath the artwork or photo. You can see this style in our collection of gallery walls with the Weighted Triptych layout, which adds a whopping 14" of matting below each 14" x 1o" photo!

Weighted Triptych gallery wall, comprised of 3 Weighted Gallery framed photos each measuring 23" x 30"
As for the top, left and right matting widths, feel free to get creative if there is a specific style you are going for. We've seen mats that are top and bottom-weighted, as well as at-home custom framers who like the look of extra mat width on each side.
As with any custom framing project, we are standing by to offer advice and assistance if there is anything you need. Our goal is giving you the tools to get more of your favorite artwork and photos up on the walls where you can enjoy them every day.

Happy framing!


