Whether you're a photographer looking to print and frame your own work for a gallery show, or simply want to frame a photo and make it look amazing on your wall, quality is important.
Several decisions go into printing the perfect image, and to help you through the process we've put together an easy and comprehensive guide on how to prepare your image for printing.
It's part of our mission to make online custom framing as intuitive, convenient and affordable as possible.

Framing a Photo Online
1) Image Quality
For the digital photo you'd like to print and frame, make sure the image file is as high-quality as possible. This will help result in a crisp, vibrant print at your desired size.
The most important aspect will be the image resolution, which refers to the number of pixels in the digital file. The more pixels, the larger you'll be able to print the photo and still maintain sharp and clear details.
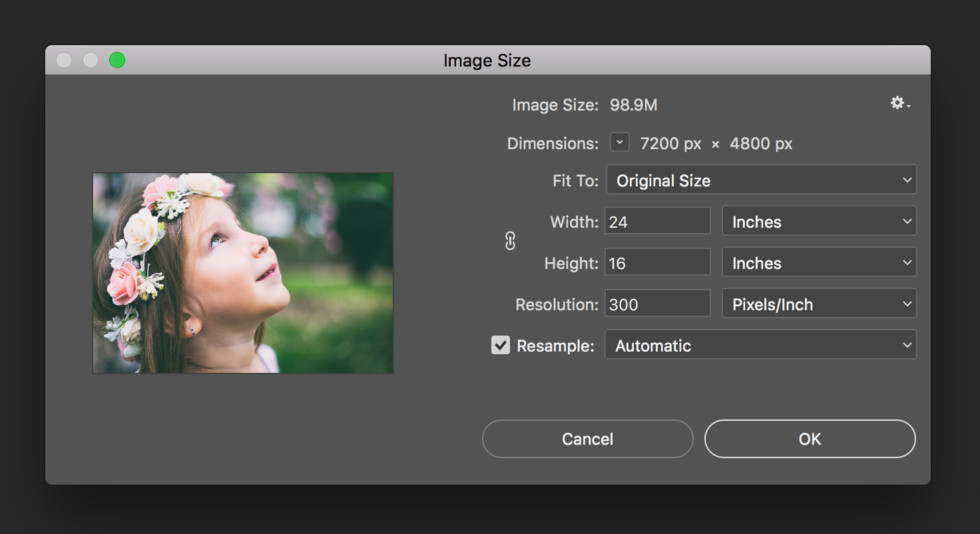
If you're exporting an image from software like Photoshop, you'll also want to set the DPI (dots per inch) over 150, and preferably at 300. DPI is the number of dots per inch in a printed image so, as with pixels, the more the better.
2) Choosing The Right Print Size
If you have a specific print size in mind, you'll want to make sure the aspect ratio you've chosen is correct. Otherwise you run the risk of having an image that looks stretched or is cut off once printed.
The best way to confirm an aspect ratio is with Photoshop or another app (like Preview for Mac) that allows you to see and manipulate the size of your image. This way, you can adjust your file height or width to your desired print size, and the software will automatically adjust the other dimension.
In Photoshop: Go to "Image" in the top menu bar, and select "Image Size"
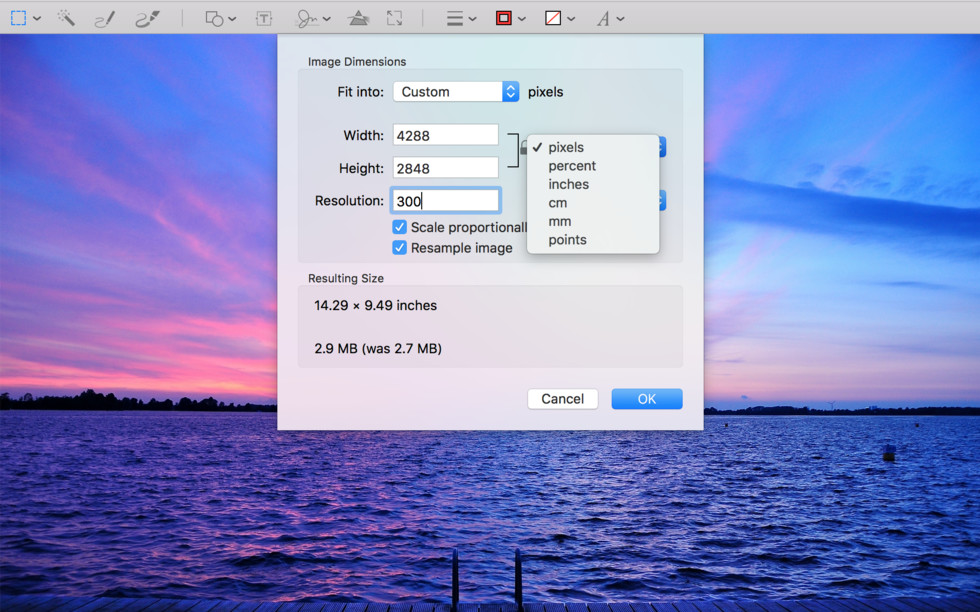
In Preview: Go to "Tools" in the top menu bar, and select "Adjust Size"
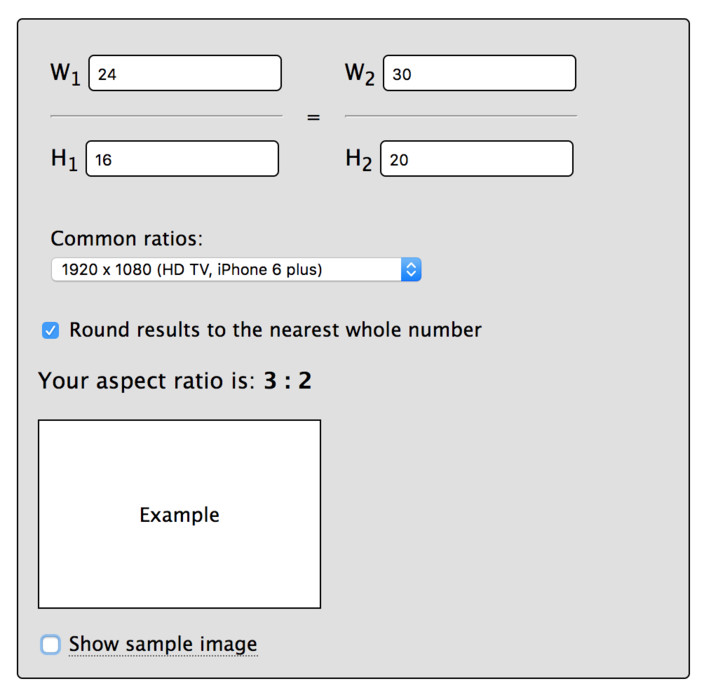
If you don't have access to a program like this, there are free online tools such as this Aspect Ratio Calculator that can help.
As long as you know the original dimensions of your image (you can even use your file's pixel sizes), just enter those as "W1" and "H1", then enter either your desired width or height (as "W2" or "H2"). The calculator will then provide the missing dimension, giving you the correct print size for maintaining your desired aspect ratio.
The next important step is to confirm that your image will print well at the size you've chosen.
If you're looking to print a photo taken on a modern camera or smartphone and your desired print size is less than around 18 x 24", chances are you won't have any issues.
However, if you're printing something you found online or if the original file is fairly old, it's always a good idea to check.
Again, an easy way to do this is using a photo editing software, like Photoshop's view print size feature, but there is a slightly more manual method as well. If you know the image's pixel dimensions, you can use those to calculate your max print size. Just divide the width and height of your file in pixels by your DPI. In order to optimize quality, keep in mind that your DPI should always be 100 or higher.
For example: If your pixel dimensions are 6000 x 4200, divide each of those numbers by 150 to get your max print size with a DPI of 150: 20 x 14".
3) How We Make It Easy For You
If any of the above is unclear or you don't have time for the math, simply upload an image to Level's website for printing and framing and we''ll automatically detect the resolution and present a range of sizes that will print well.

You can expand the More Options control to crop your photo however you like, or set a custom print size. But if you have any issues figuring out whether or not your file would print well at a given size, reach out to us and we'll make some recommendations.
4) File Types
PNGs and PNGs are very common file types for images and should print well. TIFFs are also excellent for printing.
We can handle file sizes of up to 300MB and over 125 megapixels, but If you're trying to upload a PSD, PDF or if your file size is too large, just contact us and we'll coordinate getting your file ready for the next steps.
Materials for Printing and Framing
When it comes to your photos and printed artwork, we know that materials matter, which is why we only use the best printing and framing components.
There are tons of options out there, but here are the basics you'll want to know (and what we offer):
1) Printers
To make sure your images end up looking exactly how you envisioned them, our Epson SureColor P9000, Canon 8400 and Canon 9400 printers are color-calibrated, which means they will print true to the colors in your original file.
Keep in mind that printed images do not have the same color range as the one on your monitor, so physical prints can sometimes look darker than what you see on your screen.
Our printers are wide format, and can print images for framing up to 60 x 96". So, if you're looking to frame large artwork and photos, we're well equipped for the job!
2) The Ink
Archival pigment inks are the go-to for any serious printer (including us!) and ensure that your image will not fade or discolor for a very long time -- If you were curious, up to 200 years in ideal conditions.
They're also eco-friendly, which we love. It's why for several years we planted one tree for every order placed to help with reforestation in the fight to reverse climate change.

Other types of inks, such as solvent dye-based inks, are not archival and should be avoided if you're going for real longevity and depth of color.
3) Paper Types
As far as paper goes, there are several types to choose from, each with its own unique qualities and textures.
They can vary in finish and thickness, and can play an instrumental role in the overall look of the final result. The papers we use to print artwork and photos are archival, acid-free and thick stock.
When framing a photo, expand the "More Options" control to access the different choices.

Here are our main three main offerings for printing photos:
Matte
Our 285g Archival Matte art paper has a slightly textured surface, with no reflectiveness. It gives a more painted, artistic look that's ideal for art prints and black and white photos.
Lustre

Professional Kodak Lustre paper is a classic type of photo paper and has a slightly glossy, reflective finish. This one is great for portraits, as well as more colorful, crisp photos.
Textured Watercolor
A 100% cotton, 300g paper with a subtle texture that adds depth to photographs and fine art prints.
Once your images are ready for printing, all that's left is to choose the perfect frame.
At Level, we make it a point to only use premium ingredients, like 4-ply conservation-grade mat boards, framer's grade acrylic glazes and 100% wood frames.
We hope we've answered all the questions you'll face during the printing and framing process, and that you'll be able to sail smoothly through. If you're ever unsure about whether your image will print clearly, or have questions about how Level will make sure your images look their absolute best, we're here!
Watch a custom framed photo go from start to finish, handcrafted by our talented printing and framing teams:
Happy framing!


