Getting a favorite photo or piece of artwork framed is a good feeling. With online custom framing, it's easier than ever. Figuring out where to hang it and how to make it look perfect on your wall? Maybe not so much.
If you're unfamiliar with the fundamentals of hanging picture frames or just looking for pointers, we're here to help make your experience better.
The Hardware
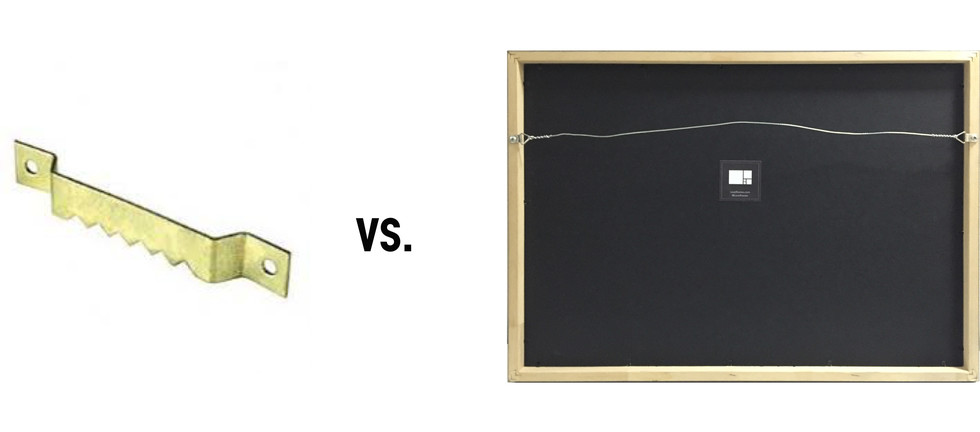
The most common types of hanging hardware are the sawtooth and wire systems.
For smaller frames - anything under around 14" x 14" - a sawtooth bracket on the top rail of the frame provides enough support while making for easy hanging and leveling. A single nail in the wall is all you need.
For frames that are a bit larger, a hanging wire attached to the two side rails is the way to go. The wire can safely bear more weight and is easily attached to the back of your frame with d-rings.
Wire also allows for the use of multiple hanging hooks for even more support when hanging oversized frames. Two hooks 10" to 12" apart from one another will bear the weight of a heavy frame and pull it in close to the wall.
Here is more guidance on how to hang your picture frame using both types of hanging hardware.
What You Will & Won't Need
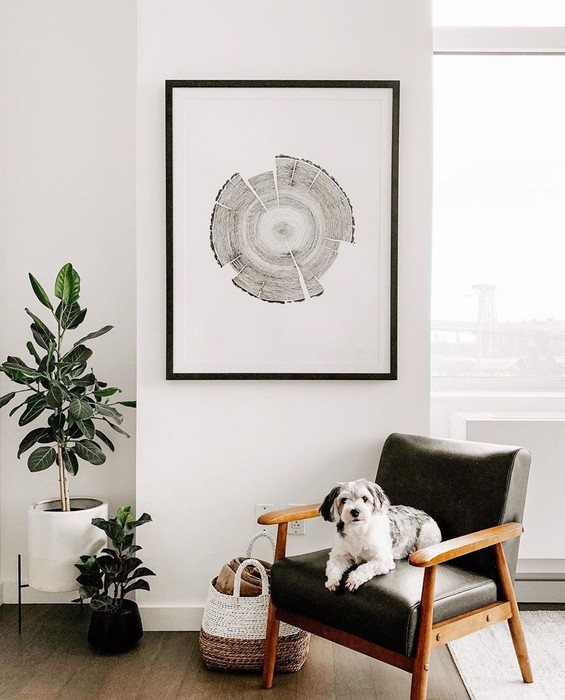
Image credit: @crysun on Instagram
Once the hardware is installed, here are a few tools that will be handy for the hanging process:
- Tape measure
- Pencil
- Hammer
- Painter's tape or kraft paper (optional, for placement)
If you frame with Level, we make sure to include everything you'll need to easily get your frame up on the wall ASAP.
When framing at home, we'll send the empty frame directly to you with a goodie bag containing all of your hanging hardware: The wire and screws which attach to the back of your frame, a small screwdriver, and a sturdy picture hook and nail.
Artwork we frame for you at our studio as well as framed photos will arrive ready to hang with the wire already installed.
Bonus Tip:
If you're installing hanging hardware on your own frame and need to make holes the frame, the tools you will need depend on the wood. With softer woods, a screwdriver may be enough to get the job done. If your frame is made of a harder wood like maple, you'll likely need to use a drill.
Measuring & Placement

Image source: Little Bits of Home, Pinterest
One common mistake when hanging framed artwork has to do with placement, hanging your frame too high or too low.
The trick is to keep things around eye-level, especially when hanging your frame above a piece of furniture like a bed or couch. A good rule of thumb is to leave at least 6" between the top of the furniture and the bottom of the frame for breathing room.
Before you hammer any nails in place, you can plan out your placement with painter's tape or kraft paper to provide an idea of how everything will look when finished. Use the materials to make a "true-scale template", which is just a paper cutout or tape outline the same size and shape as the frames.
To prevent your frame from scuffing the wall and keep it level, apply self-adhesive bumpers to the bottom corners on the back of the frame before hanging. All Level frames should come with felt or plastic bumpers that you can apply as a last step.
Bonus tip:
Sometimes it can be difficult to get your frame completely level just by eyeballing it. When in doubt, there are plenty of level tool apps that can help with this, e.g. Bubble Level for iPhone or Android.
Mixing Frame Colors & Styles

Image source: Pinterest, Sacramento Stree
Some people can decorate flawlessly, without any fear of choosing the one wrong color and potentially throwing off the whole room. For the rest of us, the temptation to make everything match - just to make things easy - is undeniably strong.
Have no fear. We're here to tell you that it's okay to mix and match frame colors. In fact, it adds the kind of character and variety the monochrome look can lack.
Get creative with your combinations, mixing different wood tones together or throwing in some gold or silver frames with a glossy finish to make things pop.
Alternate black and white frames to liven up even the most minimalist space, and hang large pieces alongside smaller ones to create a gallery wall that plays to your personal style.
When mixing frame colors and textures, try to stick to two to three sizes to make sure there's some repetition that ties everything together.
If you want an easy starting point to keep your gallery wall cohesive, our four top selling frame styles are timeless and match well with one another no matter what you're framing:
Left to right: Black, White, Maple, Walnut

Hopefully these little tips & tricks will help you sail smoothly through your next frame-hanging experience.
If you have any questions about a custom project, or if you're looking for a specific frame style to complete a room, feel free to reach out to us via email or the chat bubble at the bottom of the screen.
Happy framing!


