One of the best features of custom framing is being able to size the frame to perfectly fit your art prints, posters and photos.
To achieve that, we need to first come up with accurate dimensions for whatever it is you are framing.
In the following video and the article below, we have a few simple steps that will help you avoid common pitfalls and measure your artwork like a pro.
Using the Right Tools
First, we need to select our measuring tool.
Your best bet, if you have one handy, is a contractor’s measuring tape. A ruler or yardstick is also fine to use, or even a tailor’s measuring tape.

Just make sure you’re using the correct unit of measurement, since all of these usually have a side for inches and a side for centimeters (on our site you have the option to use either one).
You'll also want to avoid anything that seems vintage, or has been broken or warped in some way that could affect your measurements.
Folding rulers can be especially problematic.

Vintage Bulgarian folding ruler. Image credit: ARoadThroughTime on Etsy
They need to be extended perfectly straight to be accurate, and any loose connections between the different ruler segments can further throw off the calibration.
Orientation of Your Frame
Before we get to the actual measurement, give your art a clean, flat surface to avoid any accidental damage and give you enough room to maneuver. It’s also helpful have pen and paper handy to write the measurements as you take them down.
Next, we want to make sure we don’t get our width and height confused, since that determines the orientation of the frame and hanging hardware.
The width describes measurement from left to right, while the height describes the measurement from top to bottom.
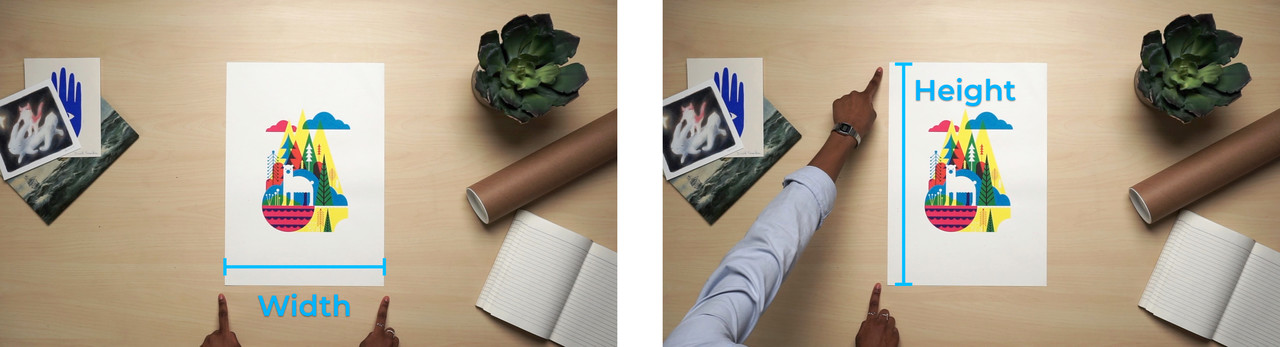
When we ask customers to provide their artwork dimensions or describe the dimensions of a framed art print or framed photo, we use Width x Height in that order.
The last dimension to consider, if you have a three-dimensional object, is the depth, or thickness of the item. We don’t typically need this measurement, but if your art is more than 1/16” thick, it’s a good idea to let us know so we can make sure the frame accommodates it.
Lining It Up
The first and most important set of dimensions you'll need for any framing project is the artwork measurements from paper edge to paper edge.
Note that some measuring tools have a little extra space at the beginning, so make sure you’re starting at the zero mark.
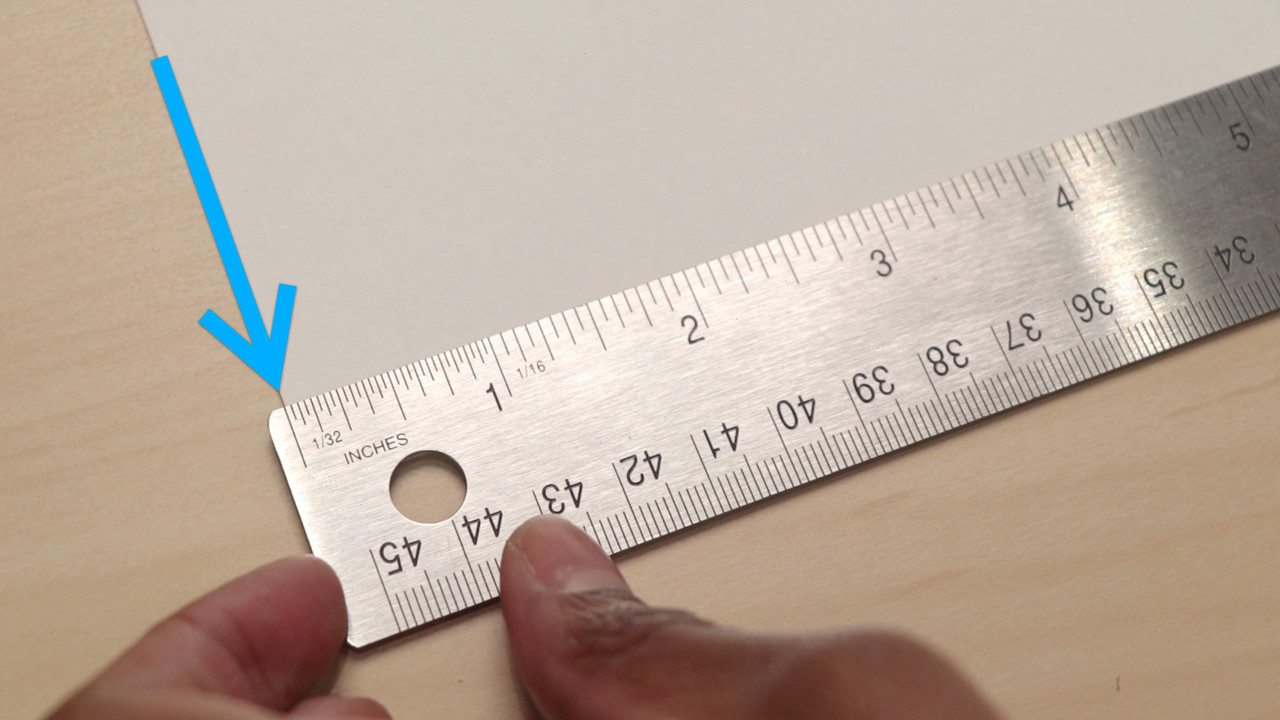
Using our tape measure and starting from the beginning (and zero inches point), we can see below a width reading of 12-5/8".

Between every inch marker, the biggest line that is halfway in the middle is the 1/2" line. Halfway between that line and the inch markers are the 1/4" lines (1/4" and 3/4"). And halfway between the quarter inch and the inch lines you will find the 1/8" line.
You can see on the above that we landed on a 1/8" marker, and if you count up from the 12" mark you will see that the paper reaches the fifth 1/8" mark after 12", or the 12-5/8" mark.
With custom framing, we can operate with dimensions provided to the nearest 1/8", as there is a small amount of tolerance inside the frame. If you are in between 1/8" increments, you can round upwards.

Now we’re measuring the height, which is 17-5/8". And there we go!
You are ready to enter your artwork dimensions on our site and get to the fun part: Choosing a profile color and mat style that suits your artwork as you design the frame.
Borders, Signatures and Edition Numbers
Have a print with borders around the image, or a signature or edition number?
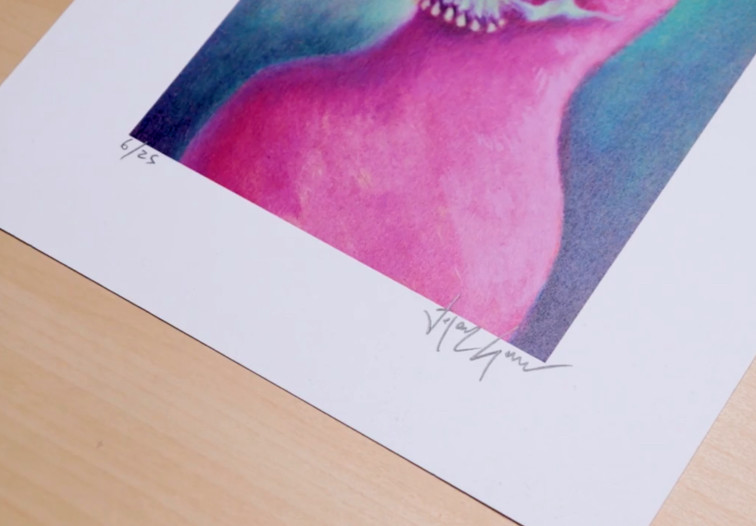
If you are framing your print without any matting, use the edge-to-edge measurements of the paper when entering your dimensions.
If you would like to add a mat, there are a few different options you may want to consider. We run through everything you need to know in our guide to framing art with borders or signatures.
Your Frame and Artwork Together
Each one of our custom frame is made to order based on your exact measurements using museum-quality materials.

If you ordered a frame with no matting (also known as a straight-fit), the inside lip of the frame will overlap your artwork by approximately 1/4" to hold it in place.
For our DIY framing kits that allow you to frame from home, a mat added to your frame will also overlap the artwork by 1/4" on all sides. If you are sending artwork to us to be framed in our studio and sent back ready to hang, we can create a slightly smaller overlap.
We hope you found this guide to measuring your artwork helpful.
As always, the Level Team is standing by to help you with any of your framing needs.
Happy framing!


